

The BetaFPV Pavo Femto is a 2S 75mm tiny whoop designed particularly for the DJI O4 Air Unit. Weighing below 100g together with the battery, it delivers spectacular 4K onboard recording and a crisp 1080p reside video feed. On this evaluation, I’ll stroll you thru my first impressions, discussing design, setup, flight efficiency, and evaluating it to a different O4 whoop—the Meteor75 Professional.

For more information on Tiny Whoops, try my purchaser’s information: https://oscarliang.com/best-tiny-whoop/
The place to Purchase
You may get the Pavo Femto from:
Contained in the field, you get:
- The drone itself
- An additional set of propellers
- A USB-C adapter for connecting the FC to Betaflight
Word: The beneficial battery is a 2S 450mAh pack (not included), get them right here: https://oscarliang.com/product-t4aj. The identical battery designed for the Pavo Pico additionally matches completely within the Pavo Femto.
Specs
- Wheelbase: 75mm
- Motors: LAVA 1102 Brushless Motor
- Body: Pavo Femto Brushless Whoop Body (Black)
- Propellers: Gemfan 1611 3-Blade Propellers (40mm)
- Flight Controller: F4 2-3S 20A AIO FC
- Receiver: Onboard Serial ELRS 2.4GHz
- Digital camera & VTX: DJI O4 Air Unit (Lite)
- Hover Time: ~5:quarter-hour
- Weight:
- 54.8g (with out battery)
- 84.4g (together with 2S 550mAh LiHV)
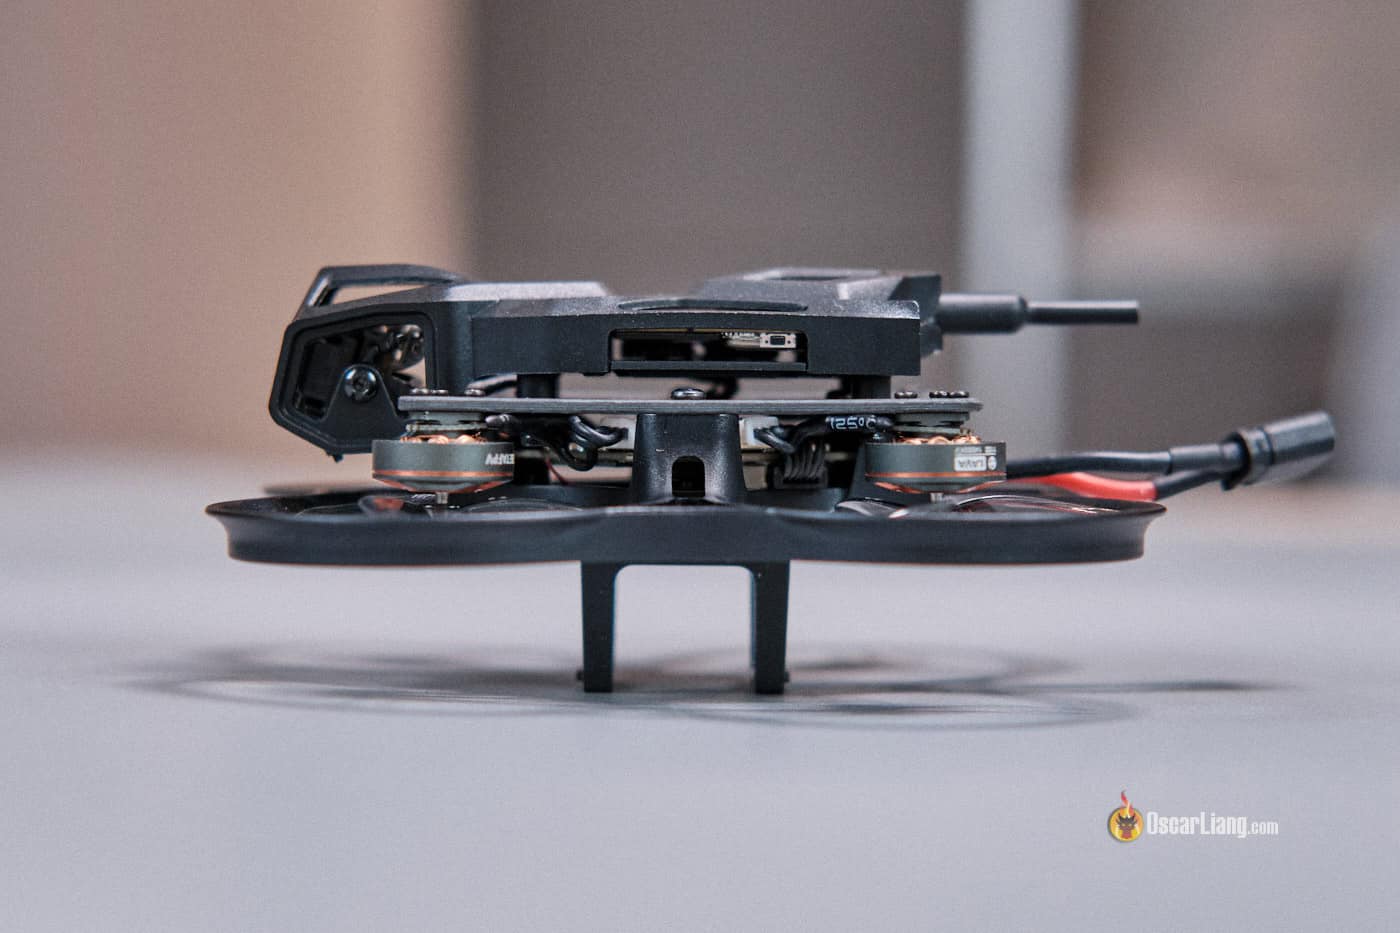
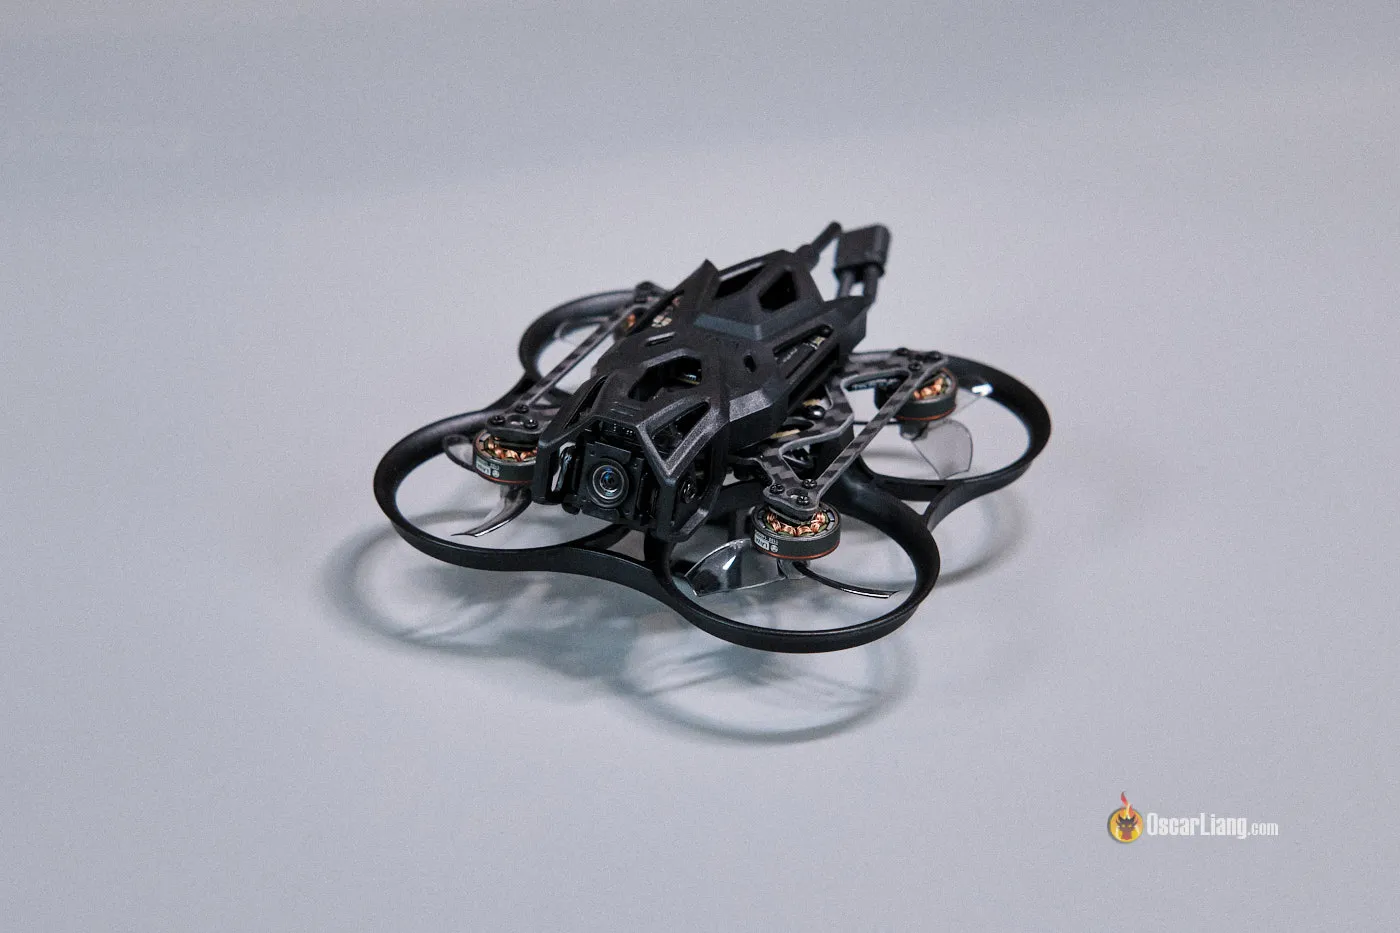
Construct and Design
The Pavo Femto is actually a 75mm tiny whoop that spins 40mm props—however powered by a 2S battery, it packs additional energy for improved outside efficiency in difficult situations in comparison with its 1S counterparts.
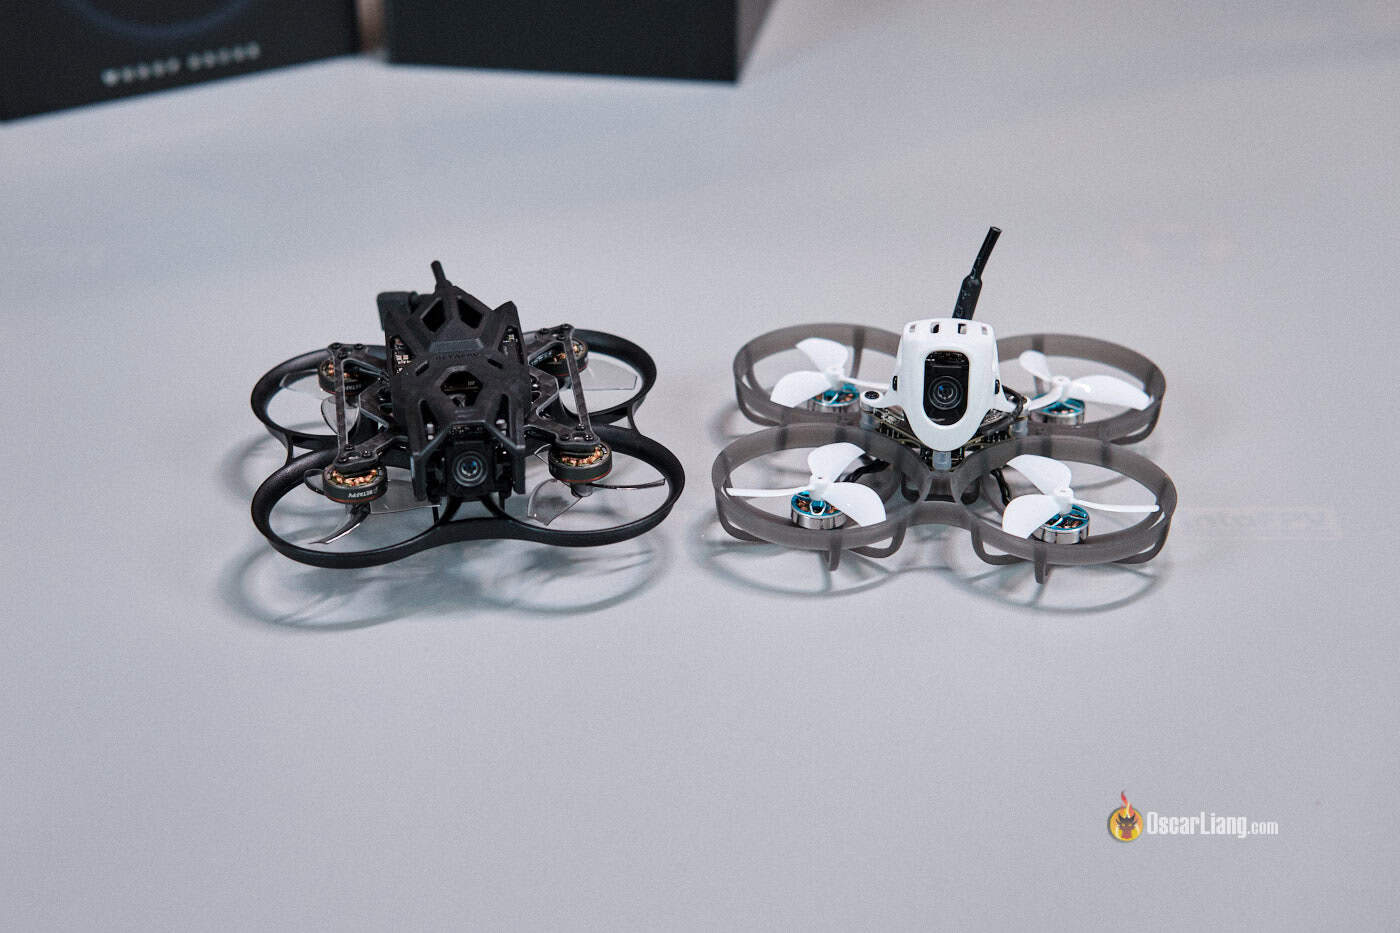
It’s extremely compact—even smaller than the earlier Pavo Pico (as soon as hailed because the smallest BNF drone carrying the DJI O3 Air Unit) and even the not too long ago launched Meteor75 Professional, a 1S whoop with O4. Notably, whereas each the Pico and Meteor75 Professional use bigger 45mm props, the Femto makes use of smaller 40mm props.
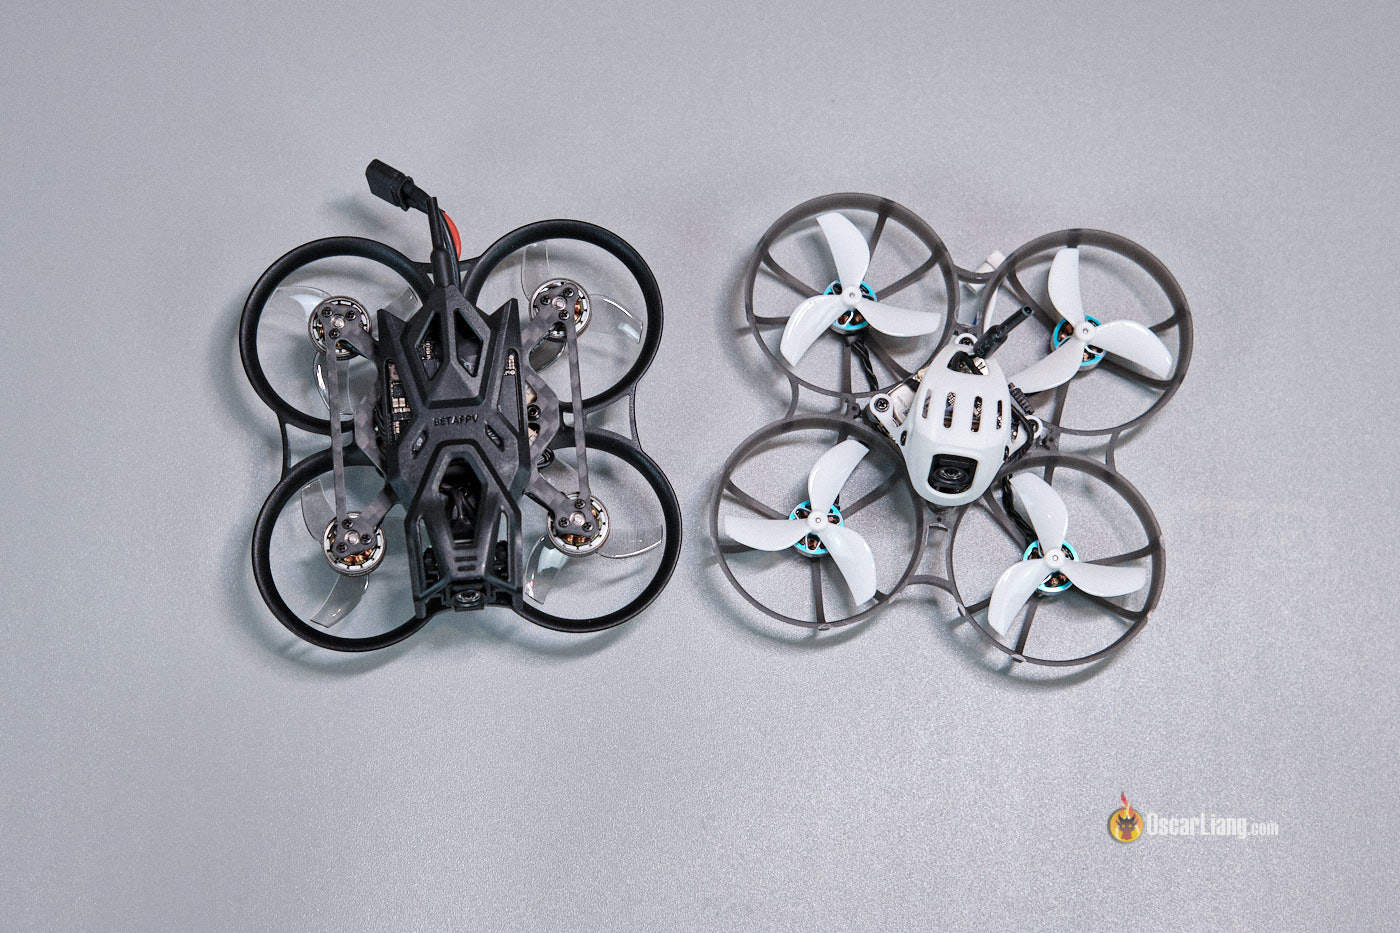
Left: Pavo Femto; Proper: Meteor75 Professional
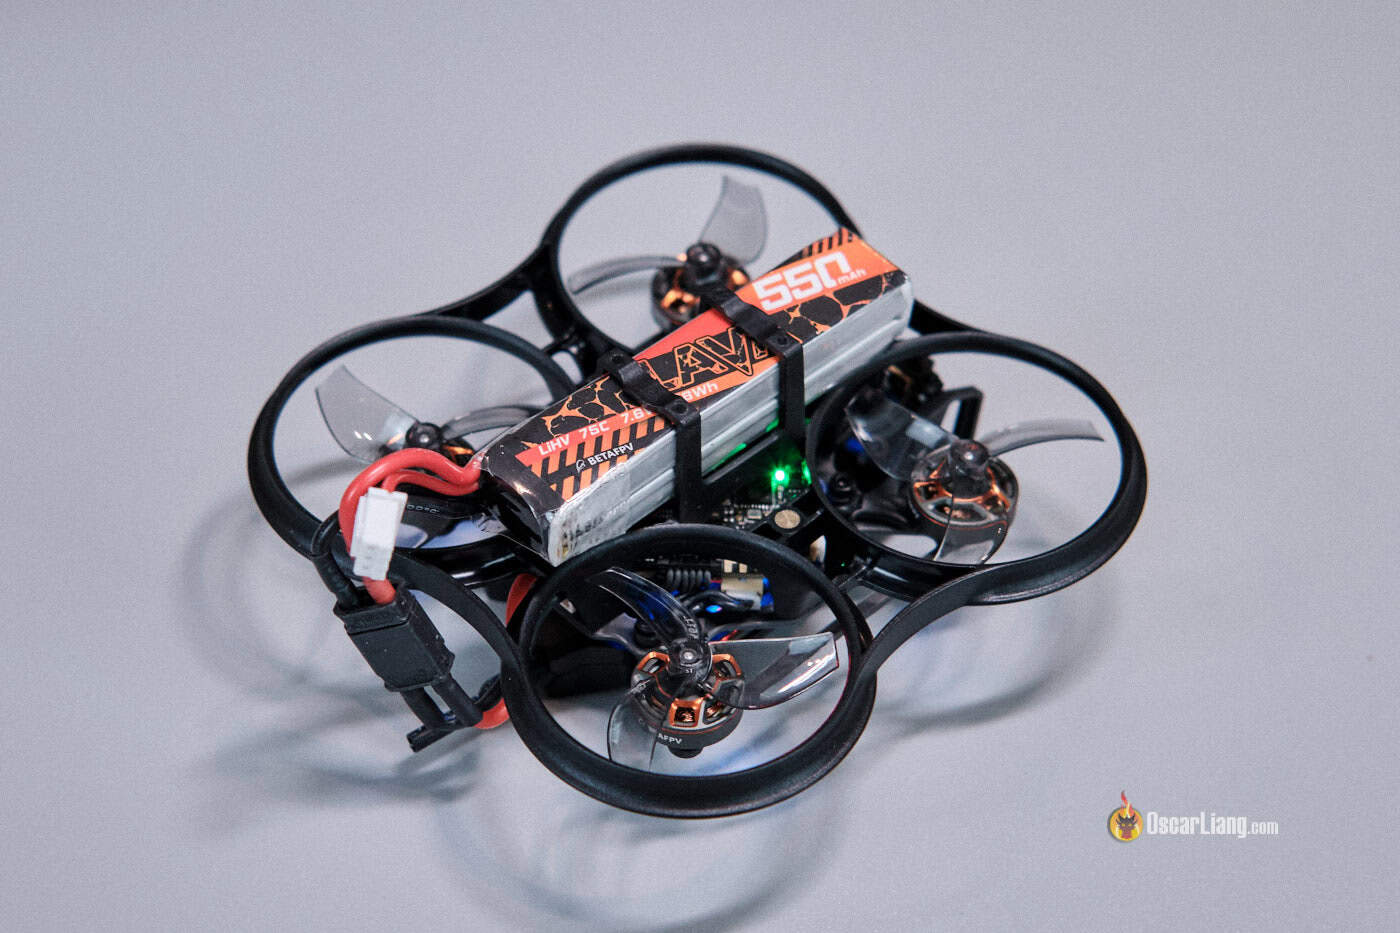
Regardless of its tiny measurement, the load distinction is putting. With a 2S battery put in, the Femto weighs about 84g—in comparison with 36g for different O4 tiny whoops. In different phrases, this tiny whoop is kind of heavy, it’s successfully carrying two 1S 550mAh batteries. Its “tanky” body, constructed with loads of plastic for elevated sturdiness, additionally provides to the load.
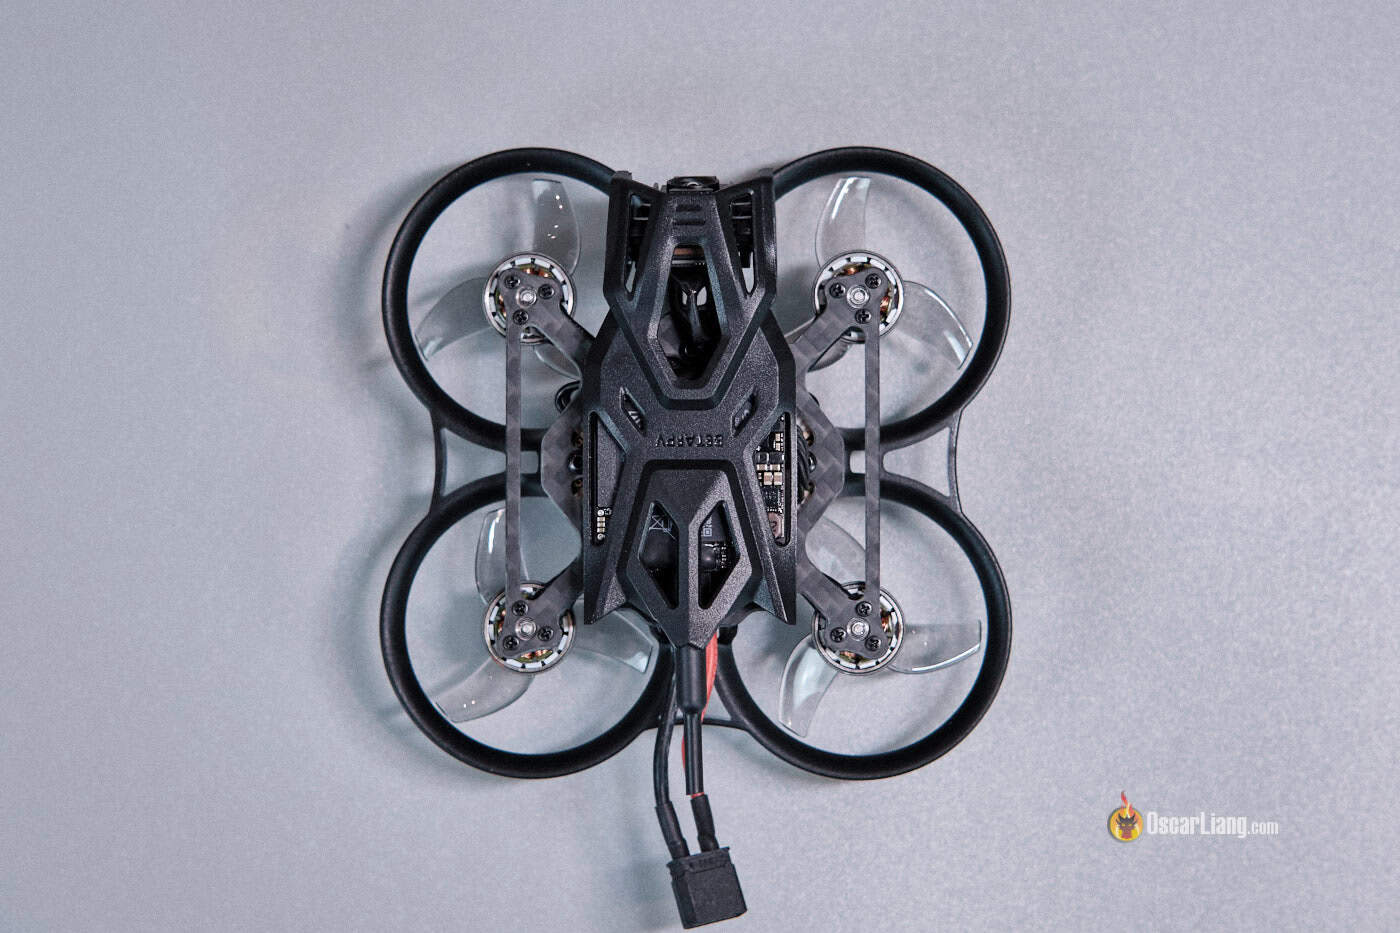
The battery holder is built-in into the stiff injection-molded plastic body, that means it may well solely match one battery measurement. A versatile, detachable TPU battery holder would have been extra versatile, accommodating numerous battery shapes and sizes.

The Femto makes use of an XT30 connector, which is widespread for 2S micro drones. I’m a bit shocked BetaFPV didn’t go for their proprietary BT3.0 connector—which I recognize for its simplicity and lighter weight—however XT30 does provide a wider vary of battery compatibility.

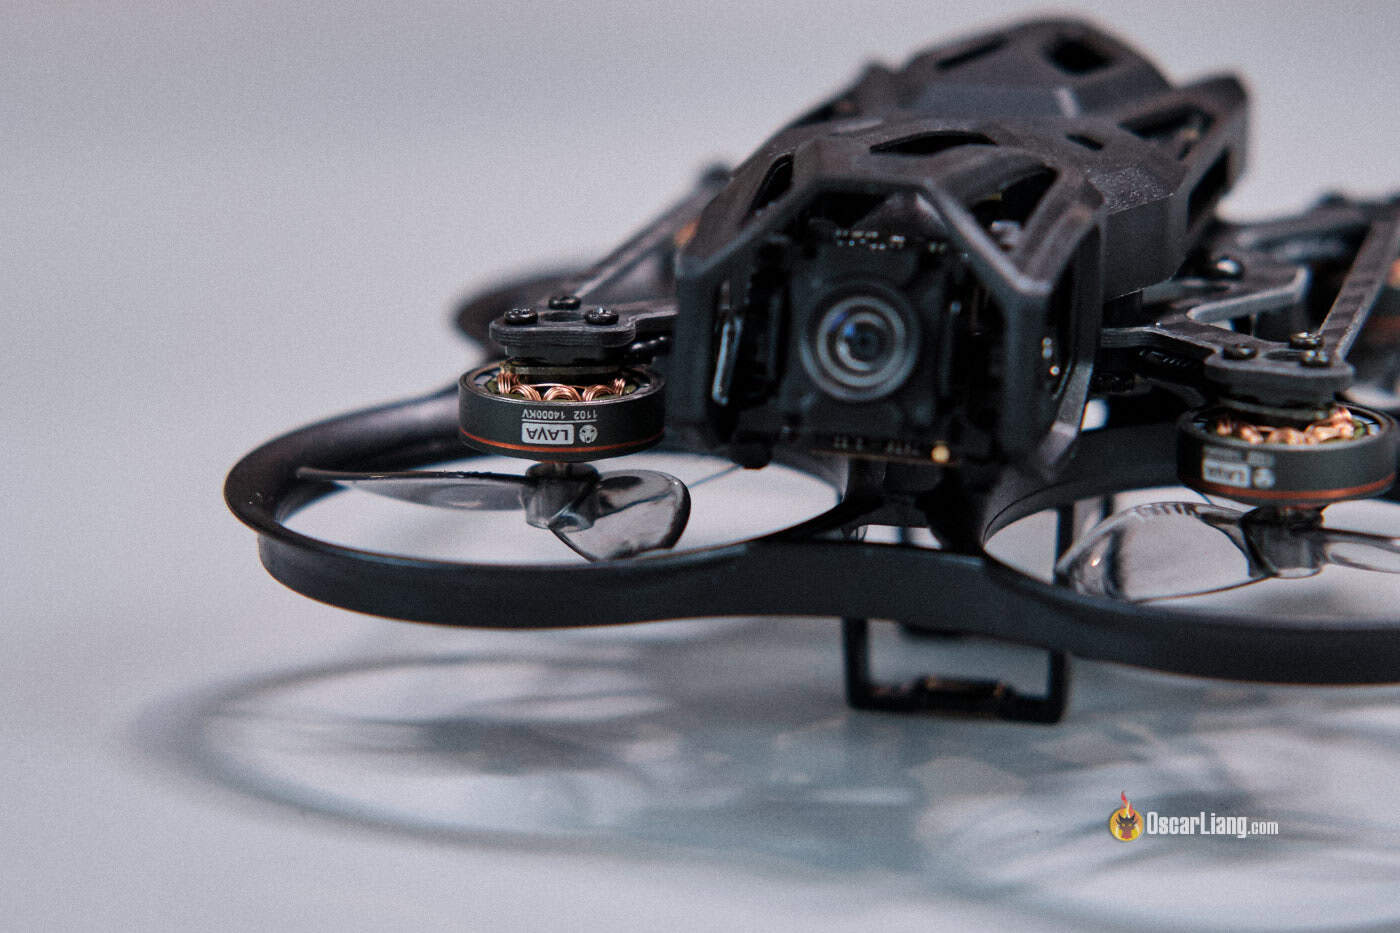
Beneath the hood, the drone is powered by BETAFPV LAVA 1102 motors at 14,000KV, paired with an F4 flight controller that includes 20A ESCs. It additionally consists of an built-in ExpressLRS receiver and 16MB of Blackbox logging reminiscence. With a complete of 5 UARTs (solely 2 in use), there’s loads of enlargement potential.
Set up
Putting in the DJI O4 Lite into this compact body isn’t as easy as with different Pavo fashions. If attainable, I’d suggest shopping for the drone with the O4 Lite pre-installed on the manufacturing unit to keep away from the trouble and potential points throughout set up.
For an in depth tutorial on putting in the O4 within the Femto, try BetaFPV’s information:
O4 Integration and Tender Mounting
The DJI O4 Air Unit wants no introduction—we have now been speaking about it many occasions previously 2 months, try my evaluation in case you haven’t already. As talked about in my evaluation, its susceptibility to vibration and jello means correct smooth mounting is a should.
BetaFPV makes use of an revolutionary smooth mounting mechanism within the Femto that they’ve refined over the previous few weeks. This mount encompasses a two-piece design: a again piece with two mounting screws on the edges (19mm width) and a entrance clamp that secures the digicam. The 2 elements are linked by 4 vibration-dampening “balls” that scale back the vibrations reaching the digicam.
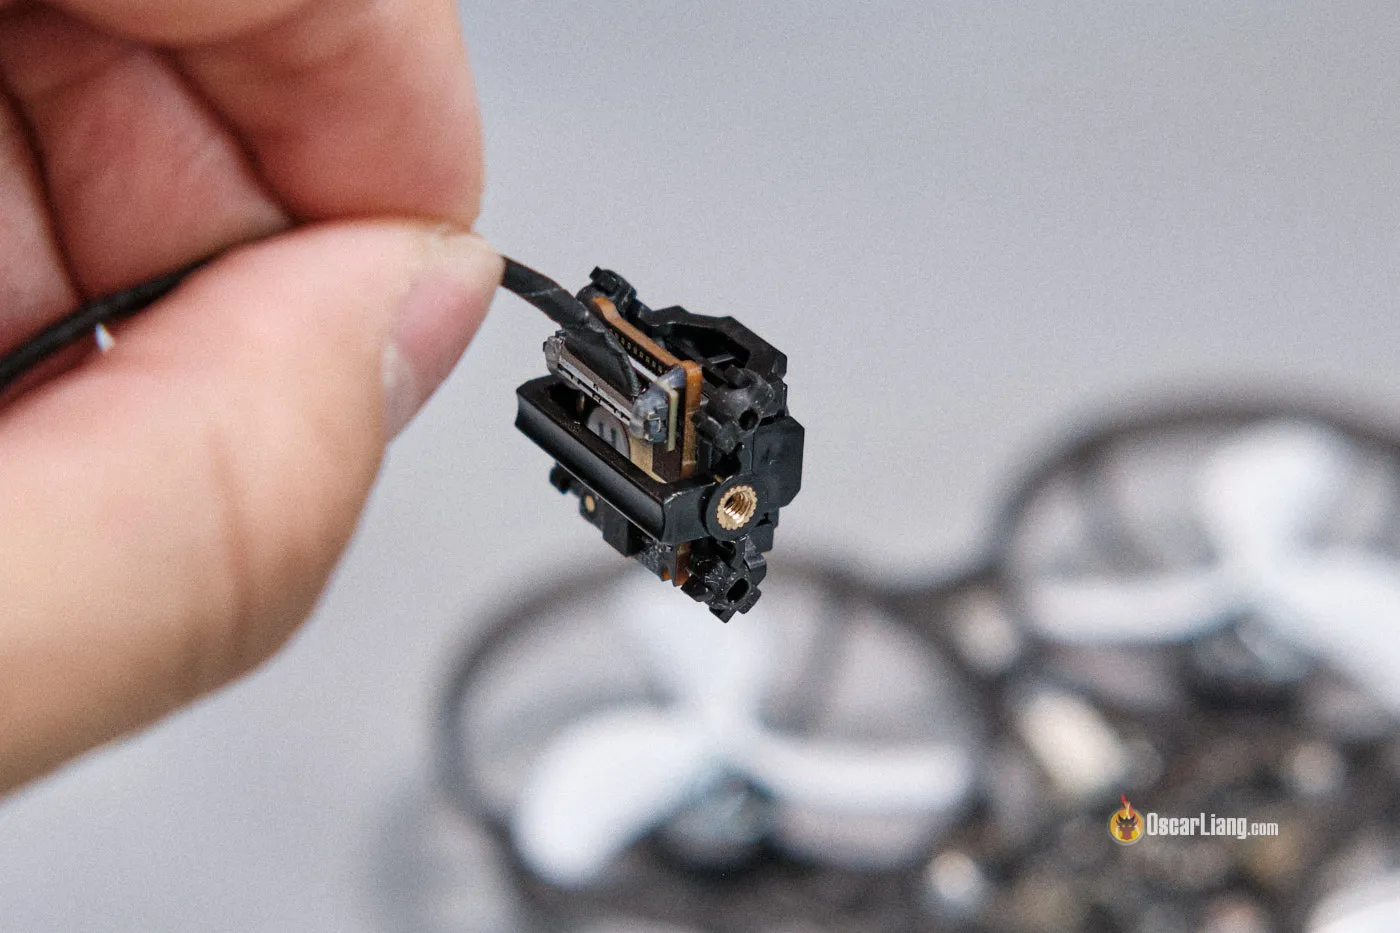
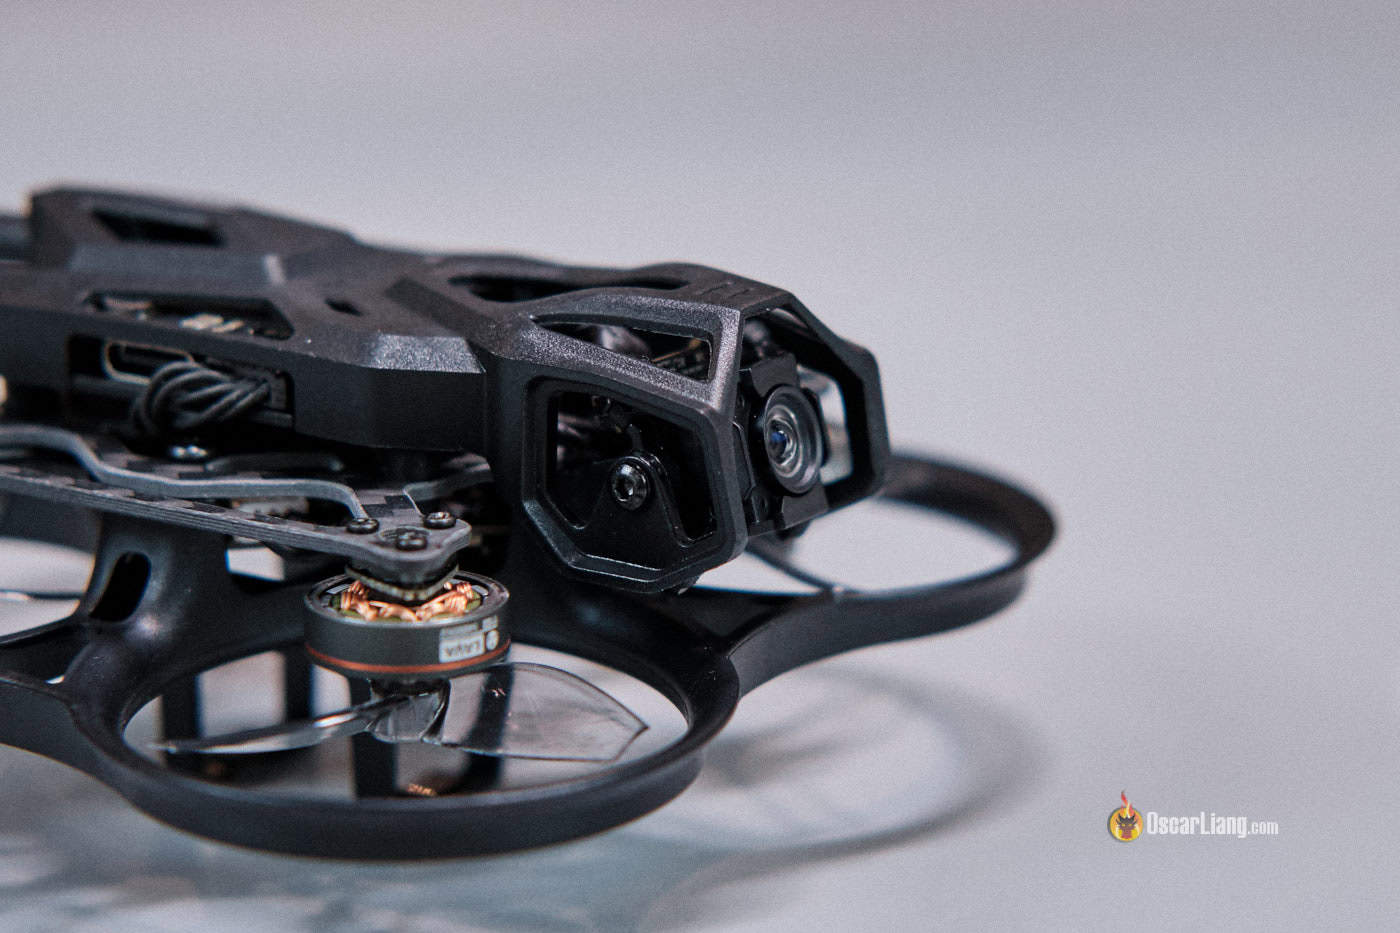
Nevertheless, one situation I observed is that the silicone dampers seem like touching the body, doubtlessly transferring undesirable vibrations. A barely roomier cover may present a wider hole and additional isolate the digicam.
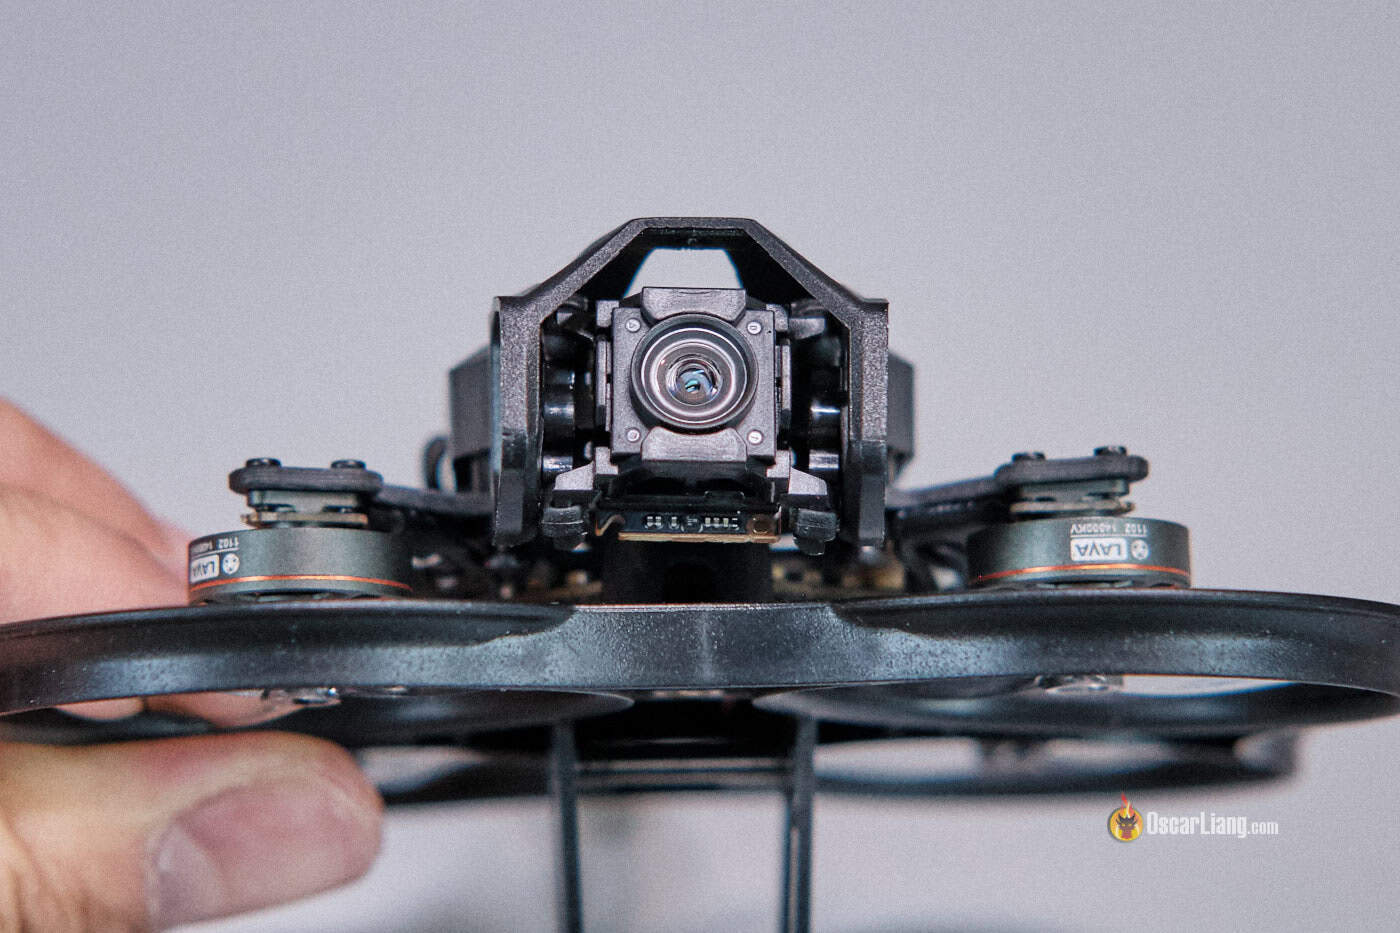
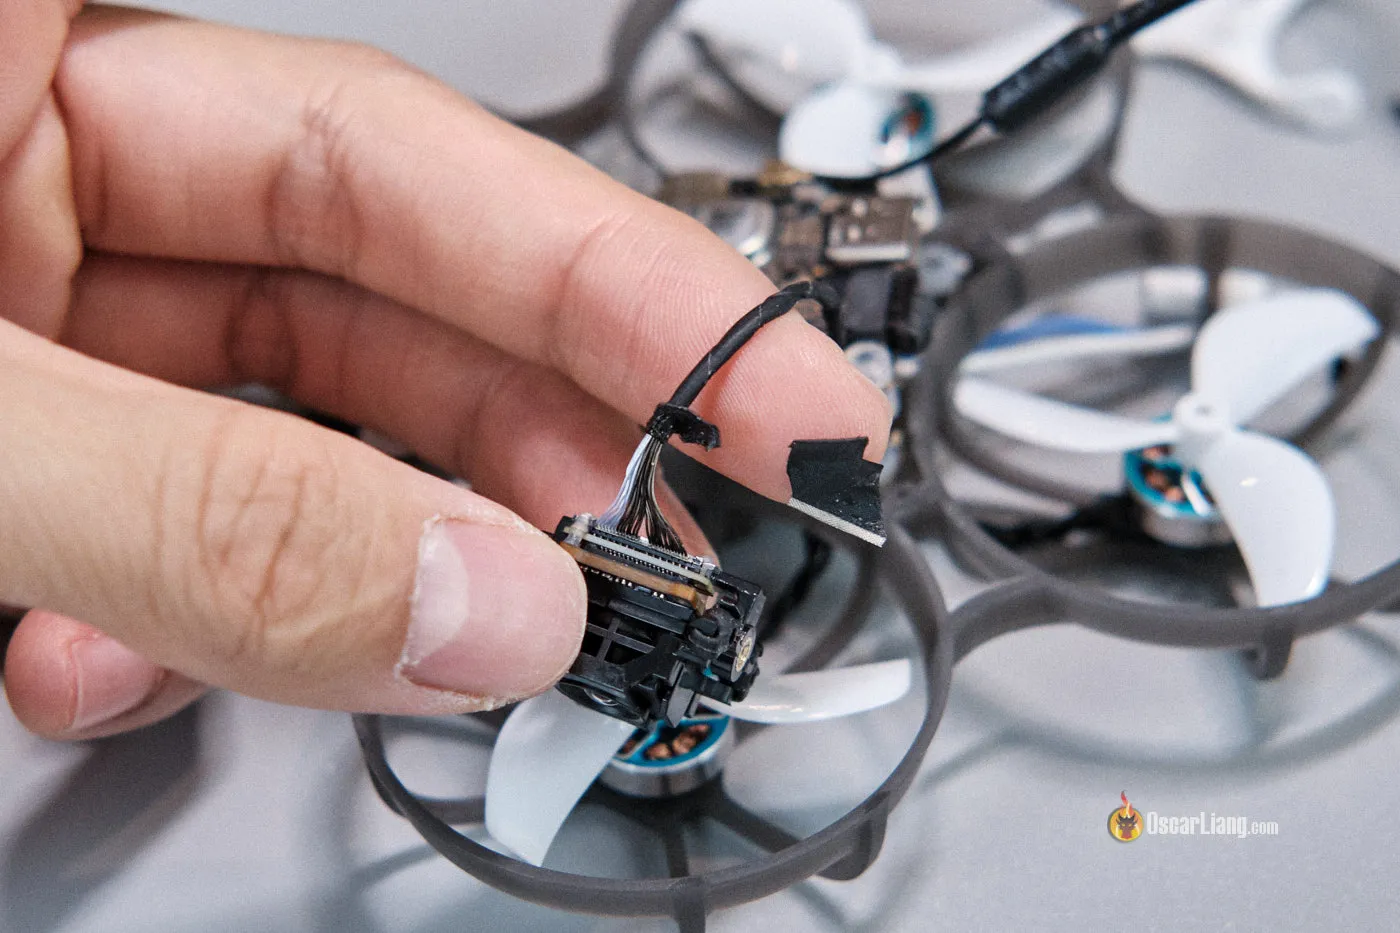
One other potential situation is expounded to the O4 digicam. Particularly, the digicam cable is kind of brief and inflexible, which may switch vibration to the digicam. Ensure that it doesn’t rub towards the body. Moreover, you would strive eradicating 5–10mm of tape close to the digicam connector to show the extra versatile a part of the cable, decreasing rigidity and vibration.
It’s simple to entry the bind button and USB-C port on the O4 air unit.
Flight Efficiency
Uncooked footage:
Regardless of its heavy weight, the Pavo Femto is extremely snappy and responsive because of its compact type issue. Outdoor, it flies easily in calm situations; nonetheless, when you introduce a little bit of breeze, the drone may change into twitchy—seemingly as a result of mixture of tiny propellers, heavy weight, and the design of its prop guards.
I attempted flying the Femto indoors, however I discovered it more durable to regulate exactly in comparison with equally sized 1S tiny whoops. Its elevated weight means it doesn’t really feel as nimble, with extra momentum making speedy route modifications slower. Moreover, the Femto is noticeably louder than 1S whoops (together with the Meteor75 Professional O4), and the load raises considerations about potential harm if you crash.
Stabilized footage utilizing Gyroflow:
On the upside, opposite to stories about O4 stabilization points, I’m pleased to report that mine carried out fairly properly even outside. There have been some minor vibrations right here and there, however general the stabilized footage was usable. That mentioned, the sphere of view is pretty slender, so personally I want the uncooked, non-stabilized footage.
In my assessments, I used to be getting round 4 minutes and 45 seconds of flight time utilizing the beneficial BetaFPV LAVA 2S 550mAh LiHV battery. With a 450mAh battery, the flight time dropped to simply 3 and a half minutes.
Evaluating to Meteor75 Professional
BetaFPV seems to have acknowledged {that a} 1S 75mm platform is barely too small to successfully carry the DJI O4 Air Unit for outside flying.
The Femto, powered by a better voltage 2S battery, is noticeably extra highly effective than the Meteor75 Professional and may deal with stronger winds outside. Nevertheless, this elevated energy comes with trade-offs: the Femto is noisier and fewer agile indoors resulting from its heavier weight. The smaller props imply that the motors must work more durable (spinning at larger RPM) to maintain the drone afloat in comparison with the Meteor75 Professional, making it louder and considerably much less environment friendly. On the flip facet, the quicker RPM response interprets to higher uncooked efficiency and responsiveness.
Whereas the Femto’s enhanced energy is interesting for outside flying in calm situations, it’s in a clumsy place. For indoor flying, I nonetheless assume the Meteor75 Professional provides superior dealing with. Outdoor, the Femto flies properly, solely when the climate is calm; as quickly because the wind picks up, I begin to discover some wobble and jello within the footage, and the drone may be pushed round extra simply than bigger fashions.
Tips on how to Setup
To hook up with Betaflight configurator, use the supplied USB-C adapter.

Flight Controller Board Goal: BETAFPVF405 (preloaded with Betaflight model 4.5.0). Authentic CLI Diff obtainable right here.
The ESC is preflashed with Bluejay, (C-X-70 – Bluejay, 0.19)
Setup Directions:
- Bind the ELRS Receiver: Plug within the USB cable, wait about 60 seconds till the receiver enters WiFi mode (inexperienced LED flashing quickly). In your telephone, be a part of the ExpressLRS RX WiFi community (be certain that to position your telephone near the drone, because the WiFi sign from the FC is extraordinarily weak). Open browser and go to 10.0.0.1, then enter your bind phrase on the webpage. Detailed directions may be discovered right here: https://oscarliang.com/bind-expresslrs-receivers/#Technique-3-Getting into-Bind-Phrase-in-Net-UI
- Pair the DJI O3 Air Unit together with your Goggles: Comply with the directions right here: https://oscarliang.com/how-to-setup-dji-o4-lite/#Pairing-DJI-Goggles-3-with-O4-Lite. The O3 doesn’t require activation, so you’ll be able to fly as quickly because it’s paired.
- Setup the Modes Tab: Configure your arm swap, angle mode, and turtle mode. For steerage, see this tutorial: https://oscarliang.com/betaflight-modes/#How-to-Setup-Arm-Swap
- In Energy tab, set warning voltage to three.4V, and min voltage to three.2V – I are likely to land when voltage drops to three.3V resulting from voltage sag, and if you land the voltage would usually rise to three.5-3.6V.
That’s it—your Femto ought to now be prepared for its maiden flight!
Last Ideas
In conclusion, in case you’re searching for a sub-100g tiny whoop that may be flown each indoors and outside, the Pavo Femto is value contemplating. Nevertheless, if cinematic video high quality is your prime precedence, you may be disenchanted with the present efficiency of the DJI O4 Lite. In that case, you may need to think about a bigger drone outfitted with the O4 Professional. Whilst you can fly the Femto indoor, personally I want the Meteor75 Professional because it’s extra exact, quieter and causes much less harm if you crash.
Nonetheless, for enjoyable flights—particularly outside on calm days—the Pavo Femto proves to be an attractive and succesful little drone. Its distinctive mixture of 2S energy, compact measurement, and sturdy efficiency makes it a noteworthy entry within the tiny whoop market.
You may get the Pavo Femto from: