

Few computer-related disasters can drain the colour out of your face faster than shedding a doc you’ve been busily engaged on. Whether or not your Mac crashed, froze, you forgot to avoid wasting, otherwise you by accident clicked on delete, it might probably really feel like an immediate catastrophe. However, all won’t be misplaced. We’ll present you how one can get well that vanished Phrase doc.
Actually, if the whole lot is working because it ought to, it’s fairly exhausting to lose a file in Phrase. The software program has an autosave function that implies that, within the occasion of an accident, you need to nonetheless have the majority of your work obtainable, besides something you’ll have performed within the final ten minutes earlier than the file disappeared. Our high tip can be to save a doc as quickly as you begin engaged on it to make sure that it autosaves frequently.
PROMOTION
EaseUS Information Restoration Wizard | Get better Unsaved Information
EaseUS Information Restoration Wizard simplifies the method of recovering unsaved Phrase paperwork, Excel sheets, PowerPoint shows, and PDF information on Mac. By scanning your system, exhausting drive, momory card, USB and different storage media on Mac, it identifies information that haven’t been saved and presents a preview so that you can evaluation your recoverable information with ease. Now 25% OFF Unique Code: MACWORLD25.
However that’s not why you’re right here. In the event you’ve opened Phrase and may’t discover that doc you have been engaged on – don’t panic! There’s a good probability you could get your doc again. On this article, we’ll run via the varied methods you’ll be able to get well an unsaved or deleted Phrase doc.
How one can get well an unsaved Phrase doc
We’ll run via a couple of doubtless situations you is likely to be confronted with when making an attempt to get well that Phrase doc. As we stated above, the excellent news is that Phrase for Mac has a built-in autosave function referred to as AutoRecover. Because of this Phrase is quietly saving the doc you’re engaged on with out you needing to manually inform the software program to take action.
For this function to perform correctly, you’ll must initially save the doc with a reputation after which Phrase will make incremental saves each ten minutes. Nonetheless, even should you haven’t performed this, Phrase will nonetheless save your doc and you need to be capable to discover a model of it within the AutoRecover folder.
Beneath we’ll run via how you can get to the AutoRecover folder and another steps you’ll be able to take to get well your doc.
State of affairs 1: You might be engaged on a Phrase doc and you must restart your Mac with no probability to avoid wasting first
- Answer: Open Phrase once more to see an autosaved model of your doc.
The excellent news is that if you’re utilizing an up-to-date model of Phrase then simply opening up Phrase once more ought to get well the doc—or not less than a really latest model of it.
It’s because Phrase autosaves your doc – even should you haven’t saved it but.
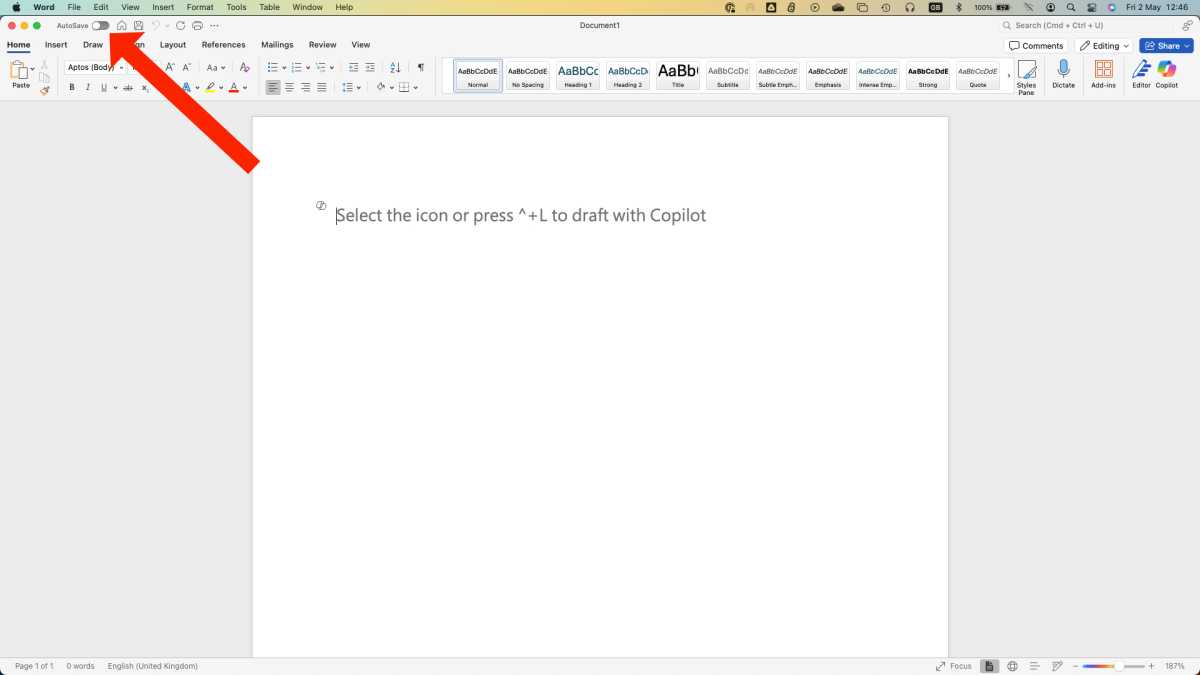
Fast Tip – How one can activate AutoSave
Whereas Phrase will attempt to save each doc in some type, it’s a good suggestion to arrange the AutoSave function manually as effectively. This solely takes a second as you’ll discover the AutoSave button displayed on the high of any window with an open Phrase doc. It could default to the off place, so simply click on it to allow the function and be certain that your work doesn’t out of the blue disappear.
Martyn Casserly
State of affairs 2: Opening Phrase doesn’t load up the doc you have been engaged on
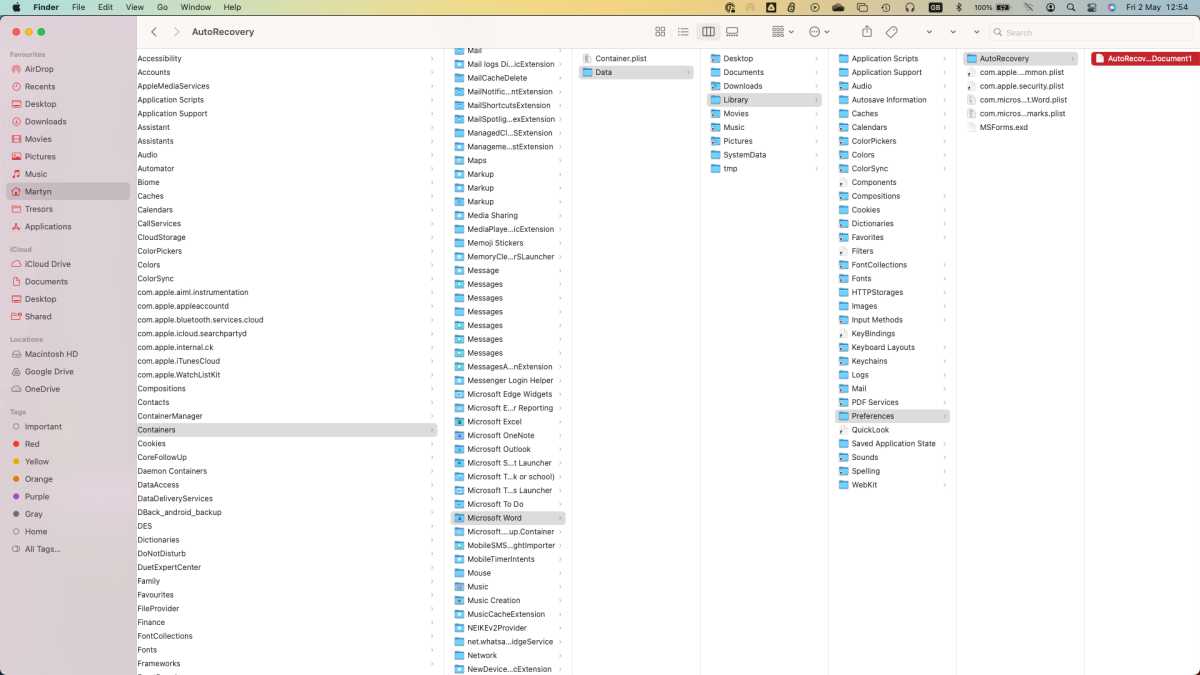
- Answer: Discover it within the AutoRecovery folder.
- Open the Finder.
- Click on on Go within the menu.
- Click on on Go To Folder.
- Paste within the following:
~/Library/Containers/com.microsoft.Phrase/Information/Library/Preferences/AutoRecovery - This can open your AutoRecovery folder the place you can see the AutoRecovery variations of your paperwork despite the fact that you didn’t save them.
Martyn Casserly
Having discovered the doc it’s possible you’ll not be capable to open it, through which case it’s possible you’ll must strive the steps within the subsequent situation…
State of affairs 3: Phrase gained’t open the AutoRecovery model of your doc
- Answer: Drag the file into a distinct textual content editor app
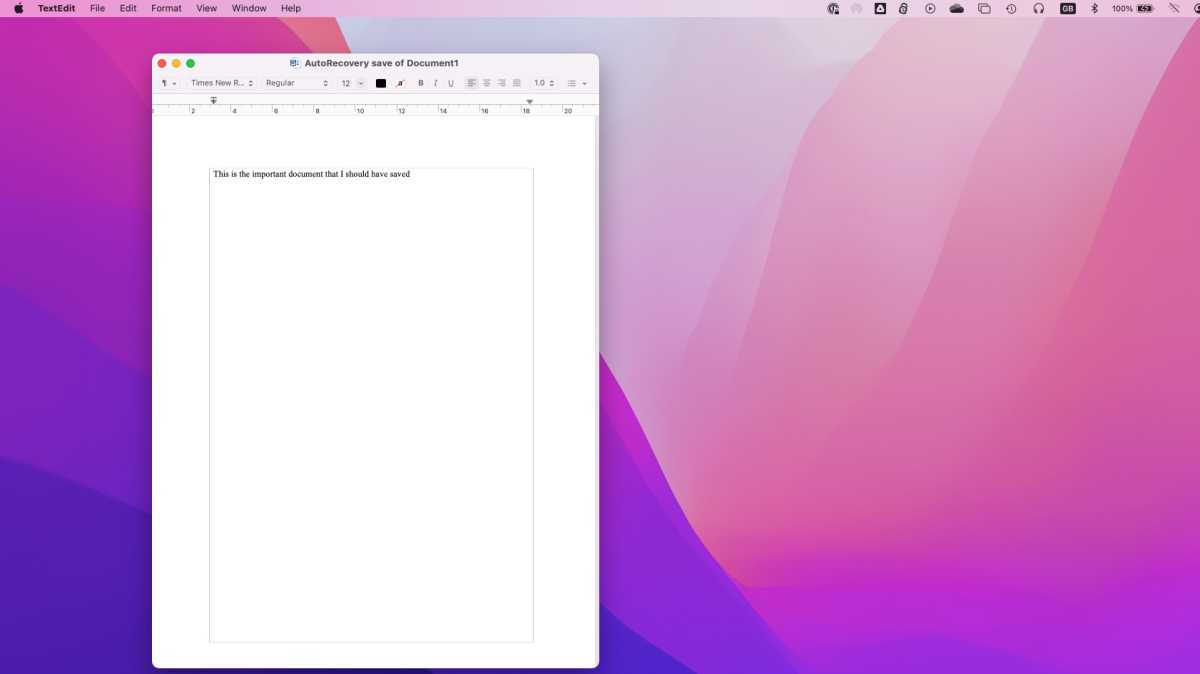
Whenever you attempt to open the AutoRecovery file (both by clicking on it or making an attempt to tug it onto the Phrase icon within the Dock) you may even see a message claiming that Phrase skilled an error making an attempt to open the file. One of many options could also be to open the Textual content Restoration Converter. Right here’s what we did:
- Open TextEdit.
- Drag the file onto the TextEdit icon within the Dock.
- Copy the textual content into a brand new file in Phrase.
Martyn Casserly
State of affairs 4: In a second of insanity you clicked on Don’t Save or Delete
- Answer: Discover the latest model within the AutoRecovery folder
The nice information is that even should you didn’t save your Phrase doc – even the perfect of us have clicked Don’t Save by chance after we have been closing paperwork – you’ll be able to get well it from the AutoRecovery folder, as we described in State of affairs 2.
Fortunately there’s a easy solution to view that folder. Simply click on to Finder and choose Go > Go To Folder and paste the next:
~/Library/Containers/com.microsoft.Phrase/Information/Library/Preferences/AutoRecovery
This can open your AutoRecovery folder the place you can see the AutoRecovery variations of your paperwork despite the fact that you didn’t save.
State of affairs 5: You made a mistake and wish to return to an older model
Answer: Browser via latest variations
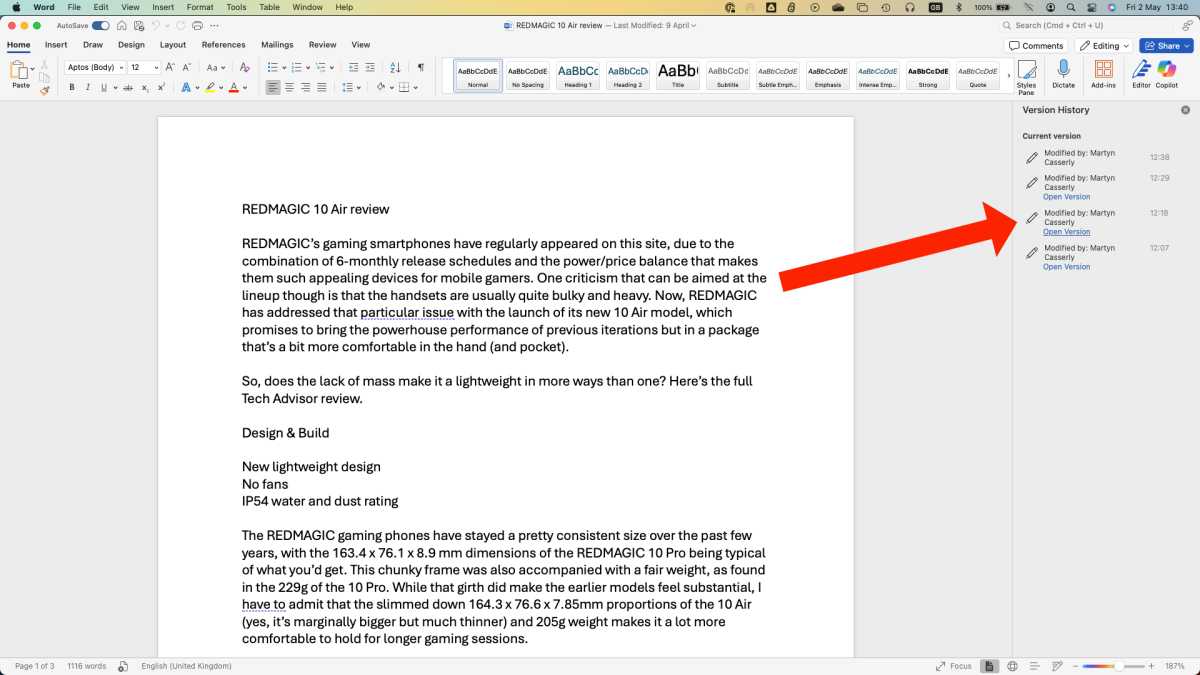
It’s not at all times the case that you simply lose the entire doc. Generally you may lose a number of the work you might have performed, which might be simply as traumatic should you’ve spent loads of time on it. So long as you might have made an preliminary save of the doc you need to be capable to browse the model historical past:
- With the Phrase doc open click on on File.
- Choose Browse Model Historical past.
- Within the right-hand column, you’ll see the model historical past. Find a model of the doc from earlier than you made the errors you want to right.
- Click on on Open Model. This can open a second copy of your doc.
- Both click on on Restore (to return to this model of the doc) or Examine (should you don’t wish to get well the entire doc and simply wish to copy and paste the bit you want).
Screenshot
Martyn Casserly
Different methods to get well a misplaced Phrase doc
If the above doesn’t work, or your model of Phrase is older than the present one, strive the steps we define beneath.
Examine the Trash
In some circumstances, your file is likely to be lacking since you deleted it. It’s simply performed if you end up making an attempt to make room in your Mac and also you take away a load of outdated information solely to comprehend that considered one of them was essential. Fortunately this isn’t as disastrous because it sounds. The doc may nonetheless be discovered within the Trash.
- Click on on the Trash can icon within the Dock to open it.
- You’ll now see the contents of the Trash. Search for your file. In the event you click on on a file and press House Bar you could possibly see a preview of it.
- In the event you don’t see your file search for a ‘Recovered Gadgets’ folder within the Trash. It’s potential that your file is situated in that.
- If it’s there you’ll must right-click on it and select Put Again. This can place the file again within the folder the place it was initially saved and you’ll proceed to work on it.
Get better outdated variations of paperwork by way of Time Machine
Whereas Phrase has its personal Model Historical past that solely works if in case you have saved the file sooner or later. Plus, if in case you have subsequently deleted the doc by chance you’ll be able to’t open it to open an older model.
In that case, you may strive Time Machine.
When you’ve got a Time Machine backup on an exterior drive you’ll be able to roll again to a time when a deleted or corrupted file was nonetheless in your system.
- Go to the folder the place you’d hope to see your file, or an earlier model of your file.
- Open Time machine and flick again via the day, weeks or months to see in case your file is there. We’ll maintain our fingers crossed for you.
- Comply with our
Full information to Time Machine for directions on how you can get well your information.
In case you are unlucky sufficient to not have a backup routine then we recommend starting one instantly. Macs are very dependable machines, however there may be at all times a danger of one thing going incorrect, so it’s finest to guard your self towards potential catastrophe.
Strive our
How one can again up a Mac function that highlights a number of options for this important apply.
What should you by no means saved your file – if in a second of insanity, you clicked on Don’t Save moderately than Save? It occurs! Are you able to retrieve your file?
Get better misplaced docs from the Non permanent folder
Your Mac additionally has a folder the place it would briefly maintain information. The Non permanent folder isn’t simple to seek out although.
To search out the Non permanent folder, use Terminal (discover it in Functions > Utilities > Terminal, or Highlight seek for Terminal by urgent Command + House.
- Open Terminal
- Kind: open $TMPDIR
- Press Enter.
Inside this TMP folder, you need to discover a folder referred to as Temporaryitems. It’s potential that your doc is likely to be inside.
Use knowledge restoration software program
There are third-party apps that could possibly enable you to get well your doc if the above recommendation doesn’t assist. Take a look at our spherical up of the perfect knowledge restoration apps for Mac. Our high selections embody the next:
In the event you would moderately not pay, there’s a free model of EaseUS’s Get better Wizard for Mac that is likely to be ok in your wants.
How one can discover AutoRecovery in older variations of Phrase
Because you won’t have the most recent model of Phrase we’ll element the steps beneath so that you can comply with to find that Phrase AutoRecovery folder.
How one can discover the AutoRecovery folder in Phrase 2016
Right here’s how you can discover AutoRecover in Phrase 2016:
- In Phrase 2016, the AutoRecovery folder is buried deep within the system and requires your Mac to show hidden information, so step one is to disclose these secret folders, to take action we advocate following our recommendation on the hyperlink beneath, though the important thing mixture to make use of is cmd + shift + . (full cease). Learn: How one can present hidden information and folders on a Mac.
- With this performed you’ll must open Finder then click on on the Dwelling icon within the left-hand column (it’s normally your title). Now navigate to the next folder:
Library/Containers/com.microsoft.Phrase/Information/Library/Preferences/AutoRecovery/
- When you’ve got any AutoRecovery information then they are going to be in right here. One factor to recollect is that AutoRecovery information are momentary and solely exist in the event that they suppose that Phrase shut down unexpectedly. So, should you clicked Don’t Save moderately than Save whenever you have been closing the doc there gained’t be an AutoRecovery file for it.

How one can discover the AutoRecovery folder in Phrase 2011
In case you are utilizing Phrase 2011 it’s simple to find the AutoRecovery folder:
- Click on on the File possibility within the Menu bar then seek for Autorecover.
- In the event you use Phrase usually then there is likely to be a couple of completely different Autorecover information, so test the date to see which one matches your lacking merchandise.
- When you’ve discovered the doc simply click on on it to open it up, then keep in mind to put it aside once more below a brand new title.
Even should you don’t discover your doc within the AutoRecovery folder, it might not be the case that it isn’t there. Information within the AutoRecover folder don’t at all times present up.
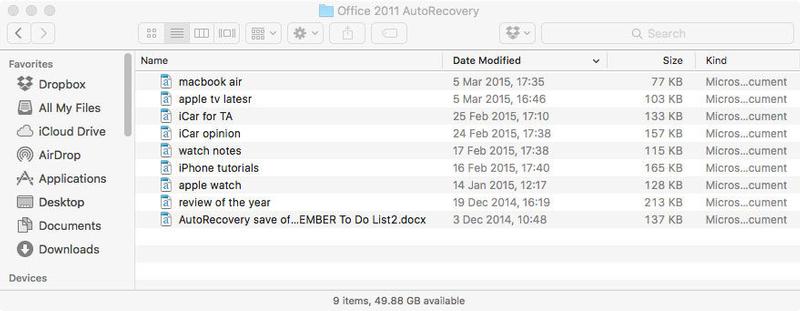
We’ve got first-hand expertise of this. Previously, our Mac has ‘helpfully’ saved a Phrase doc within the Workplace 2011 AutoRecovery folder. This could not be a difficulty, aside from the truth that after we then accessed the folder (only a fast search in Highlight for Workplace 2011 AutoRecovery) the information have been nowhere to be seen.
As you’ll be able to see from this display screen seize, the latest file in our AutoRecovery folder was from 5 March, however we all know that there are newer information saved there.
The issue with the AutoRecovery file is that it’s situated in a Library folder that isn’t seen by default, and that may have some affect on whether or not your information are seen or not. Thankfully, there’s a solution to find the file.
How one can view information in Workplace 2011 AutoRecovery folder
- Go to the Finder, and press Alt (or Possibility) whereas choosing Go from the menu on the high of the web page. This can make the Library folder seen (should you don’t press Alt you gained’t see it – and you must maintain Alt pressed or it can vanish).
- Click on on Library to open the Libray folder.
- Find the next folder: Utility Help > Microsoft > Workplace > Workplace 2011 AutoRecovery.
- Whenever you see the Workplace 2011 on this view you need to be capable to find your file.
Tricks to keep away from misplaced Phrase information
Keep away from this nightmare occurring once more – comply with the guidelines beneath.
Save first, save usually
It goes with out saying that you need to save incessantly particularly in case your Mac generally is a bit unreliable.
You could possibly depend on Phrase autosaving for you, however keep in mind that you must save the file first to essentially profit from Autosave.
Change the autosave frequency
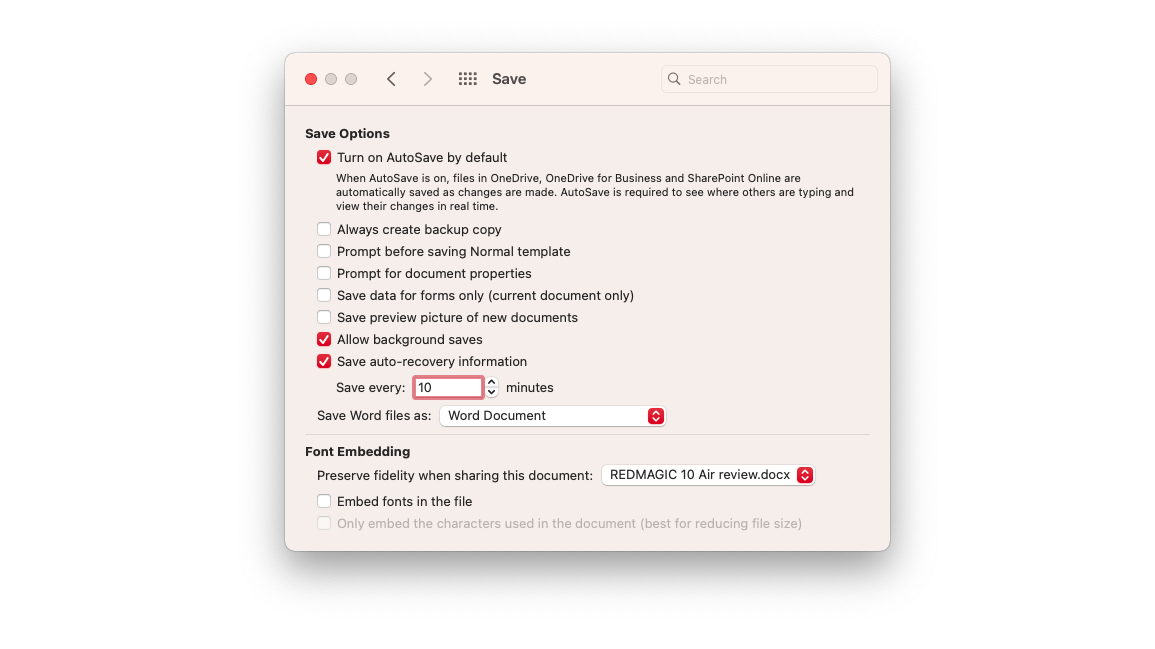
A useful factor to know is you could cut back the gaps between autosaves on Phrase for Mac. By default they’re set at ten minute intervals, nevertheless it’s simple to make them extra frequent.
In Phrase go as much as the Menu bar on the high of the display screen and click on on Phrase. From the dropdown menu choose Preferences after which within the Output and Sharing part you’ll see a disk icon named Save. Click on this and also you’ll now be capable to regulate the time between saves by getting into a worth into the ‘Save each X minutes’ field on the backside.
Martyn Casserly
Whereas it is likely to be tempting to set it as little as potential, keep in mind that Phrase’s efficiency could possibly be be hampered barely if it’s saving each minute, particularly if you’re engaged on a big file. Experiment to see what setting works finest for you.
You may additionally discover considered one of these articles useful:
How one can get well deleted information.
Need to get to know Phrase higher? Learn our
Prime ideas for Phrase for Mac.