

All people has witnessed chatbots in motion; some are spectacular, whereas others are annoying. Nonetheless, what for those who may create one that’s genuinely clever, well-organized, and easy to combine with your personal utility? We’ll use two potent instruments on this article to construct a chatbot from scratch:
- Along with LLMs, LangGraph facilitates the administration of organized, multi-step workflows.
- The chatbot may be uncovered as an API utilizing Django, a scalable and clear net platform.
We’ll start with a quick setup, which entails utilizing Pipenv to put in dependencies and cloning the GitHub repository. The chatbot’s logic will then be outlined utilizing LangGraph, a Django-powered API will likely be constructed round it, and a fundamental frontend will likely be wired as much as talk with it.
You’re within the correct place whether or not you wish to find out how LangGraph works with a real-world backend or for those who want to arrange a easy chatbot.
Quickstart: Clone & Set Up the Challenge
Let’s begin by cloning the undertaking and establishing the surroundings. Be sure you have Python 3.12 and pipenv put in in your system. If not, you may set up pipenv with:
pip set up pipenvNow, clone the repository and transfer into the undertaking folder:
git clone https://github.com/Badribn0612/chatbot_django_langgraph.git

cd chatbot_django_langgraph
Let’s now set up all the necessities utilizing pipenv.
pipenv set upObserve: For those who get an error saying you should not have Python 3.12 in your system, use the next command:
pipenv --python path/to/python

pipenv set up
To know the trail of your Python, you should utilize the next command
which python (linux and home windows)

which python3 (mac)
To activate this surroundings, use the next command:
pipenv shellNow that our necessities are set, let’s arrange the environment variables. Use the next command to create a .env file.
contact .envAdd your API keys to the .env file
# Google Gemini AI

GOOGLE_API_KEY=your_google_api_key_here

# Groq

GROQ_API_KEY=your_groq_api_key_here

# Tavily Search

TAVILY_API_KEY=your_tavily_api_key_here
Generate a Google API Key from Google AI Studio, Generate a Groq API Key from Groq Console, and Get your Tavily key from Tavily House.
Now that the setup is finished, let’s run the next instructions (be sure to activate your surroundings)
python handle.py migrate

python handle.py runserver
This could begin the server
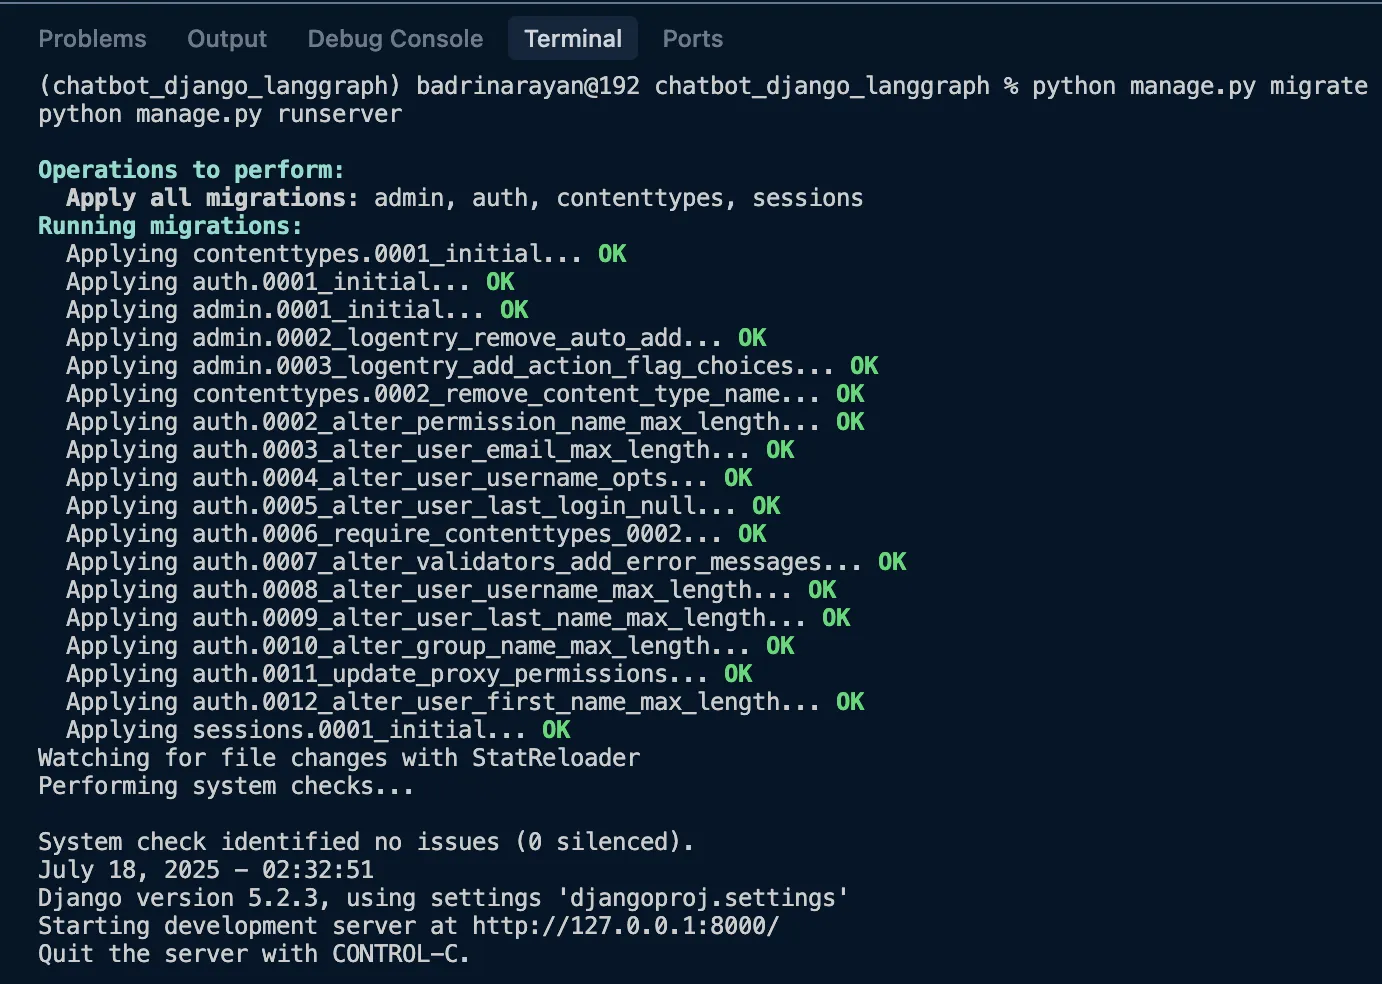
Click on on the http://127.0.0.1:8000/ hyperlink the place the appliance is working.
Designing the Chatbot Logic with LangGraph
Now, let’s dive into designing the chatbot logic. You could be questioning, why LangGraph? I picked LangGraph as a result of it provides you the flexibleness to construct complicated workflows tailor-made to your use case. Consider it like stitching collectively a number of capabilities right into a move that truly is smart to your utility. Beneath, let’s focus on the core logic. The complete code is obtainable on Github.
1. State Definition
class State(TypedDict):

    messages: Annotated[list, add_messages]
So this state schema is liable for the chatbot. It’ll primarily preserve monitor of the message historical past in case your Graph is in a loop; else, it’ll have enter with historical past of messages and append the response from LLM to the earlier historical past.
2. Initialize LangGraph
graph_builder = StateGraph(State)The above line of code will initialize the graph. This occasion of stategraph is liable for sustaining the move of the chatbot (dialog move).
3. Chat Mannequin with Fallbacks
llm_with_fallbacks = init_chat_model("google_genai:gemini-2.0-flash").with_fallbacks(

    [init_chat_model("groq:llama-3.3-70b-versatile")]

)
This mainly will make Gemini 2.0 Flash as the first LLM and Llama 3.3 70B because the fallback. If Google’s servers are overloaded or when the API hits price limits, it’ll begin utilizing Llama 3.3 70B.
4. Instrument Integration
device = TavilySearch(max_results=2)

llm_with_tools = llm_with_fallbacks.bind_tools([tool])
We’re including search instruments to the LLM as properly. This will likely be used when the LLM feels prefer it doesn’t have data of the question. It’ll mainly seek for info utilizing the device, retrieve related info, and reply to the question primarily based on the identical.
5. Chatbot Node Logic
def chatbot(state: State):

    return {"messages": [llm_with_tools.invoke(state["messages"])]}
That is the operate liable for invoking the LLM and getting the response. That is precisely what I used to be speaking about. With LangGraph, you may construct a graph made up of a number of capabilities like this. You may department, merge, and even run capabilities (referred to as nodes in LangGraph) in parallel. And sure, I nearly forgot, you may even create loops throughout the graph. That’s the type of flexibility LangGraph brings to the desk.
6. ToolNode and Conditional Circulate
tool_node = ToolNode(instruments=[tool])

graph_builder.add_conditional_edges("chatbot", tools_condition)

graph_builder.add_edge("instruments", "chatbot")
We’ll create a node for the device in order that every time the chatbot figures out it wants to make use of it, it will probably merely invoke the device node and fetch the related info.
7. Graph Entry and Exit
graph_builder.add_edge(START, "chatbot")

graph = graph_builder.compile()
from IPython.show import Picture, show
show(Picture(graph.get_graph().draw_mermaid_png()))
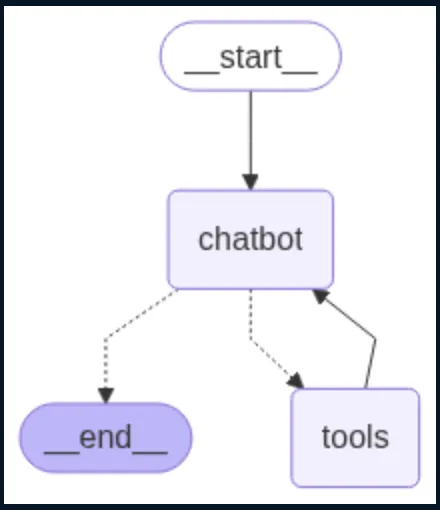
The previous code provides the specified visible.
This LangGraph setup permits you to construct a structured chatbot that may deal with conversations, name instruments like net search when wanted, and fall again to various fashions if one fails. It’s modular, simple to increase. Now that the LangGraph half is finished, let’s leap to easy methods to create an API for our chatbot with Django.
Constructing the API with Django
You should use this information to learn to make an app for those who’re new to Django. For this enterprise, we now have established:
- Challenge: djangoproj
- App: djangoapp
Step 1: App Configuration
In djangoapp/apps.py, we outline the app config in order that Django can acknowledge it:
from django.apps import AppConfig

class DjangoappConfig(AppConfig):

    default_auto_field = "django.db.fashions.BigAutoField"

    title = "djangoapp"

Now register the app inside djangoproj/settings.py:

INSTALLED_APPS = [

    # default Django apps...

    "djangoapp",

]
Step 2: Creating the Chatbot API
In djangoapp/views.py, we outline a easy API endpoint that handles POST requests:
from django.http import JsonResponse

from django.views.decorators.csrf import csrf_exempt

import json

from chatbot import get_chatbot_response

@csrf_exempt

def chatbot_api(request):

    if request.technique == "POST":

        attempt:

            information = json.hundreds(request.physique)

            messages = information.get("messages", [])

            user_query = information.get("question", "")

            messages.append({"function": "consumer", "content material": user_query})

            response = get_chatbot_response(messages)

            serialized_messages = [serialize_message(msg) for msg in response["messages"]]

            return JsonResponse({"messages": serialized_messages})

        besides Exception as e:

            return JsonResponse({"error": str(e)}, standing=500)

return JsonResponse({"error": "POST request required"}, standing=400)- This view accepts consumer enter, passes it to the LangGraph-powered chatbot, and returns the response.
@csrf_exemptis used for testing/demo functions to permit exterior POST requests.
Step 3: Hooking the API to URLs
In djangoproj/urls.py, wire up the view to an endpoint:
from django.urls import path

from djangoapp.views import chatbot_api, chat_interface

urlpatterns = [

    path('', chat_interface, name="chat_interface"),

    path('api/chatbot/', chatbot_api, name="chatbot_api"),

]
Now, sending a POST request to /api/chatbot/ will set off the chatbot and return a JSON response.
Step 4: Serving a Fundamental Chat UI
To indicate a easy interface, add this to djangoapp/views.py:
from django.shortcuts import render

def chat_interface(request):

    return render(request, 'index.html')
This view renders index.html, a fundamental chat interface.
In djangoproj/settings.py, inform Django the place to search for templates:
TEMPLATES = [

    {

        "BACKEND": "django.template.backends.django.DjangoTemplates",

        "DIRS": [BASE_DIR / "templates"],

        # ...

    },

]
We’ve used Django to remodel our LangGraph chatbot right into a purposeful API with only a few traces of code, and we’ve even included a fundamental consumer interface for interacting with it. Clear, modular, and easy to develop, this association is good for each real-world tasks and demos.
Following is the working demo of the chatbot:
Options You Can Construct On Prime
Listed here are a few of the options you can construct on high of the appliance:
- Arrange system prompts and agent personas to information habits and responses.
- Create a number of specialised brokers and a routing agent to delegate duties primarily based on consumer enter.
- Plug in RAG instruments to usher in your personal information and enrich the responses.
- Retailer dialog historical past in a database (like PostgreSQL), linked to consumer classes for continuity and analytics.
- Implement sensible message windowing or summarization to deal with token limits gracefully.
- Use immediate templates or instruments like Guardrails AI or NeMo for output validation and security filtering.
- Add assist for dealing with pictures or recordsdata, utilizing succesful fashions like Gemini 2.5 professional or GPT-4.1.
Conclusion
And that’s a wrap! We simply constructed a completely purposeful chatbot from scratch utilizing LangGraph and Django, full with a clear API, device integration, fallback LLMs, and extra. One of the best half? It’s modular and tremendous simple to increase. Whether or not you’re seeking to construct a wise assistant to your personal product, experiment with multi-agent methods, or simply get your fingers soiled with LangGraph, this setup provides you a strong start line. There’s much more you may discover, from including picture inputs to plugging in your personal data base. So go forward, tweak it, break it, construct on high of it. The chances are large open. Let me know what you construct.
Steadily Requested Questions
A. The chatbot makes use of LangGraph for logic orchestration, Django for the API, Pipenv for dependency administration, and integrates LLMs like Gemini and Llama 3, plus the Tavily Search device.
A. It makes use of Gemini 2.0 Flash as the first mannequin and robotically falls again to Llama 3.3 70B if Gemini fails or reaches price limits.
A. LangGraph buildings the chatbot’s dialog move utilizing nodes and edges, permitting for loops, circumstances, device use, and LLM fallbacks.
A. Set surroundings variables, run python handle.py migrate, then python handle.py runserver, and go to http://127.0.0.1:8000/.
A. You may add agent personas, database-backed chat historical past, RAG, message summarization, output validation, and multimodal enter assist.
Knowledge science Trainee at Analytics Vidhya, specializing in ML, DL and Gen AI. Devoted to sharing insights by way of articles on these topics. Desirous to study and contribute to the sphere’s developments. Captivated with leveraging information to unravel complicated issues and drive innovation.
Login to proceed studying and revel in expert-curated content material.