

3D printing has been a recreation changer within the cosplay world. Be taught methods from our resident cosplayer to show digital fashions into bodily costumes.
Up to date on October 4, 2022
by
Alec Richter
Up to now, creating an object primarily based on a online game was troublesome, time intensive, and usually completed by hand. My background in 3D printing comes from cosplay, and the most typical query I’m requested is “how do you make your costumes?”
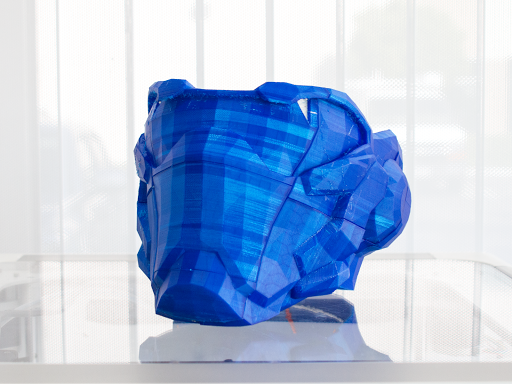
3D Printed Soldier 76 from Overwatch
I used to to elucidate the prolonged and complex means of utilizing a Japanese papercraft program, Pepakura, to assemble a paper mannequin, and coat it in noxious polyester resin and fiberglass to strengthen it. Now, the reply is way more concise: “I 3D printed it,” and the method is instantly understood.
With the momentum of 3D printing, the method of making one thing for cosplay is transitioning from bodily crafting to digital fabrication.
Due to many beneficiant makers and teams, it is rather straightforward to search out 3D fashions of objects from video video games. Generally these fashions are created by a maker footage from the online game as a reference for his or her sculpt, and these are often capable of be printed with out concern. Different occasions, fashions will probably be extracted or “ripped” from the coding of the online game, and these nearly at all times include issues.
With a purpose to save processing energy of computer systems or consoles, builders will create helmets or weapons or autos in video games by mashing completely different items collectively. Reasonably than make two elements that completely match collectively, like a cellphone case on a cellphone, they might simply make the 2 items morph into one another. When elements are morphed collectively, this could create holes within the mannequin, stopping it from being printed accurately. This implies they don’t seem to be “watertight”, which is the important thing to any profitable 3D print.

Soldier 76 from Overwatch
The instance I’m utilizing is Soldier 76’s masks from Blizzard’s new recreation Overwatch. The mannequin was discovered by Reproduction Prop Discussion board member, sturds. Whenever you “Choose All” in Sketchup, it can choose all of the faces of that mannequin. As you possibly can see right here, the visor isn’t chosen and but it’s touching the remainder of the masks (Determine 1). That is an instance of this “morphing” and it’s particularly essential to note the corners of the triangles don’t contact (Determine 2).

Determine 1

Determine 2
To repair these points, you’ll want three packages, all of that are free:
Google Sketchup
Autodesk Meshmixer
Autodesk netFabb
Step 1. Arrange Sketchup
Utilizing the Extension Warehouse (Determine 3), discover “Sketchup STL” and set up it. It will let you export and import STLs with Google Sketchup. (Determine 4)

Determine 3

Determine 4
Step 2. Draw it out: Connecting the separate items.
Google Sketchup’s “Traces” instrument has the helpful function of letting when there may be an intersection between two strains. This will probably be used to redefine the borders of the visor to attach it to the remainder of the masks.
Choose the “Traces” instrument. (Determine 5)
Hover over what appears just like the endpoint of a line (zoom in as shut as you have to).
Whenever you see a pink X and it says “Intersection,” click on. (Determine 6).
Transfer the cursor to the following endpoint till one other pink X seems, click on. (Determine 7)
You’ve simply related the 2 elements collectively, however now this must be repeated across the total fringe of the half.
Repeat till loop has been made. (Determine 8)
Notice: Generally, for causes I don’t know, Sketchup won’t let you click on on the intersection. Generally I come again to it later and see if fixing the remaining helps that time, and if it doesn’t, I create a line as near the place it must be as I can.

High row(from left to proper): Determine 5 and 6. Backside row: Determine 7 and eight
Step 3. Filling it in: Patching holes within the mannequin.
Often, there will probably be holes in a mannequin. Both the unique had it or within the means of connecting the 2 elements, a gap was created. That is simply as straightforward as connecting the elements
Click on on the final endpoint the place the 2 elements are related.
Shifting the digicam round, strive to determine the place the half ought to have continued, and click on on the road to create the face.
If a face isn’t created, join factors diagonally as essential to create triangles.
Repeat till the opposite aspect is reached, the place the 2 elements meet once more.
Step 4. Clear up inside
On the within, there at the moment are sections of the mannequin that aren’t essential. Basically, this step is about trimming away what has separated by step 2.
Discover the sting the place the 2 faces meet, the one you wish to preserve (on this case the visor) and the one you don’t (the trim across the visor). (Determine 10)
Utilizing the “Choose” instrument, spotlight the sting on the face you don’t need. (Determine 11)
Press the delete key.
Two faces ought to have vanished. The sting that you simply deleted is what outlined how these two faces had been oriented, with out it they will’t exist. (Determine 12)
Repeat this all alongside the sting, deleting all of the strains which are behind the place you marked in Step 2.
If you end up finished, you must have 2 outlines exhibiting the place the visor and trim prolonged out to. Double clicking on them will spotlight them. (Determine 13)
Press the delete key and they need to be gone. (Determine 14)

High row(from left to proper): Determine 10 and 11, Backside row Determine 12 and 13

Determine 14
Step 5. Clear up your mess: Patching new holes
As you noticed what occurred once we deleted the road defining the 2 faces, the identical has occurred to among the faces we wished to maintain. Right here’s how we convey these again: (Determine 15)
Utilizing the “Line” instrument, choose the endpoint that doesn’t have a triangle hooked up to it.
Click on on an endpoint reverse from it. (Determine 16)
This creates one triangle to cowl that gap. (Determine 17)
Repeat as essential till all holes are coated (Determine 18)
Notice: Generally it gained’t be clear which reverse endpoint is the appropriate one to choose. Attempt each till you see the appropriate contour to the mannequin. E.g connecting A to B creates a very jagged edge the place it must be easy, however A to C is a pleasant easy floor.

High row(from left to proper): Determine 15 and 16, Backside row Determine 17 and 18
Step 6. Hose it off (Non-compulsory)
Soldier 76’s masks in Overwatch has a hose on both aspect of it. Personally, I might quite take away this from the mannequin and use some actual hose for this quite than try to wash it up with sanding and portray it. When you’d want to go away one thing like that on, that’s completely tremendous too.
Simply as we did with the faces behind the visor, choose every edge that belongs to the hose, and delete it. Use your judgement to search out which faces you don’t wish to preserve; it does take just a little expertise to gauge the place one function begins and the opposite ends. (Determine 19, 20, 21)
Export your completed mannequin as an STL

Determine 19 left, Determine 20 proper

Determine 21
Step 7. Giant scale manufacturing: Sizing the masks to suit you.
Fashions from video video games don’t often have models. Chances are you’ll obtain one thing and discover it’s the scale of a home or it’s the scale of a dime. The dimensions of any mannequin must be adjusted to make sure it suits proper. On this case, for a masks, head measurement is the essential measurement.
There are a number of alternative ways to do that, this one appears the silliest.
Take a ruler and lay it on a desk.
Stand a thick e book on prime of the ruler so it’s at zero.
Take one other e book and stand it up on the different finish of the ruler
Put your head between the 2 books, protecting the one at zero stationary, transfer the opposite e book nearer till every e book is simply barely touching your ears.
The gap on the ruler is your head measurement.
That is the minimal Width of the masks.
Repeat for Size and Peak to make sure correct match.
Notice: Chances are you’ll want so as to add 1” to the measurement to permit for padding (½” on either side). Taking a look at reference materials for Soldier 76 makes this a tricky name, because the masks appears extra prefer it’s an in depth match like Iron Man quite than like a helmet. On this case you will want to make a judgement name: make it match to your head and cope with the discomfort of not having the ability to transfer your face a lot however have it appear to be references, or do you add room to pad it, be snug, and be barely too massive of a masks. No matter your selection:
Open Autodesk MeshMixer and import your STL
Click on Edit, Rework. (Determine 22)
Down in scale, change one worth till they’re all bigger than the three values you discovered. (Determine 23)
If one worth is smaller than the one you discovered on your head measurement, mess around with the numbers till one is similar and the opposite two are barely bigger. It is best to solely change one quantity to maintain the proportions of the mannequin the identical.

Determine 22 left, Determine 23 proper
Step 8. Combine it up: Using Autodesk Meshmixer to thicken your mannequin.
At this level, the mannequin we now have cleaned up is basically paper skinny, a lot too skinny on your printer to have the ability to do something with. Utilizing the options inside Autodesk Meshmixer, we are able to thicken the mannequin.
Choose all the helmet (Ctrl+A). (Determine 24)
Click on Edit, Offset (Determine 25)
Modify the Offset Distance till you don’t see the black and white stripes on the within (In my case about -3.5).
Modify Accuracy and Decision to 100%
Examine the field for “Related,” this makes the offset a part of the mannequin quite than a separate one. (Determine 26)
Export as an STL.

Determine 24

Determine 25

Determine 26
Step 9. Cram it in: Becoming a full measurement mask in your print mattress utilizing Autodesk netFabb Fundamental
Most printers can’t print bigger than 180mm squared, or so. We’ll want to chop the half into separate items. For one thing like this, I want to not use dovetail cuts or mechanically be a part of them, as I end them afterwards with paint and putty in any case. When you’d like to make use of one thing like that, try Scott’s article right here.
Import the STL you created with Meshmixer into netFabb Fundamental
Transfer the mannequin till it roughly has one nook on the origin. (Determine 27)
Utilizing one slider at a time, alter the airplane that can minimize the mannequin into sections.
I selected to separate it in spots that may be straightforward to sand or glue collectively. So I alter the Y slider till it was roughly centered on the ear mounds. (Determine 28)
Press execute minimize.
Choose “Minimize all elements.”
Press Minimize. (Determine 29)
The mannequin is now sectioned in two.
Repeat till the mannequin is cut up into sufficient items to suit in your printer. I cut up it once more in entrance of the cheek particulars on the Y airplane, under the height of the nostril within the Z airplane. (Determine 30)
Notice: When you don’t wish to slice by means of all elements throughout the window, choose one half (it can flip inexperienced) and alter “Minimize all Components” to “Minimize solely Chosen Components” (Determine 31).
Proper click on on every half you could have minimize out.
Choose Export. (Determine 32)
Title and save the half as STL. (Determine 33)

Determine 27

Determine 28

Determine 29

High row: Determine 30 and 31, Backside row Determine 32 and 33
Step 10. Some meeting required: placing all of it collectively.
Get away your Artful Pen and use it such as you’re making welds. Use some painter’s tape to carry two items flush, then extrude a thick line onto the again of the seam. With just a little follow, it ought to take solely a minute or two to weld two items collectively.
And that is it! You now have a full scale, personally sized, Soldier 76 masks. Keep tuned for future articles on how one can even out the seams, clear up print strains or stringing scars, and easy out the tough form of the unique 3D mannequin.